
Spring Breaking Through (a.k.a Abby's Quilt) - Quilting & Binding
- prarthanadickson

- Jan 12, 2021
- 4 min read
Updated: Dec 21, 2021
Welcome to the final part of making your quilt! Here's what's covered in this post - quilting and binding the quilt. Let's get right to it.
Quilting Your Quilt
Now that you've basted your quilt, we can begin the process of quilting. But why do we need quilting stitches? Quilting stitches are both functional as well as decorative. Different types of batting need extra support to stay true to form after some use and a few washes. There are many helpful websites that have the different minimum distances between quilting stitches that will keep your quilt steady. Generations Quilt Patterns is particularly helpful. Stitches that are too far apart can make the quilt unstable with the batting bunching up over time between the layers. Quilts that you would like to last and endure should have stitches that are fairly close to each other. In my quilt most of my quilting stitches are 2" apart. I hand-quilted this quilt instead of using a machine.
Quilting stitches are meant to be decorative as well! I have to admit, it is quite satisfying watching your quilt come together as you place those quilting stitches.

Where to Set-Up to Quilt
I don't have a sewing station so I set up wherever I could! You need a raised flat surface set up somewhere with good lighting and a comfortable place for you to sit. I used the ironing board for my station. The width of the board and height worked out for me as I was quilting in rows. I later upgraded to the dining table.
Quilting Stitches
For quilting I use a longer needle, and regular thread. There are pros to using quilting specific thread, which is sturdier than regular thread, but as I was making this quilt during the lockdown, I used whatever was lying around the house. I doubled the thread to make it a little stronger. I prefer the longer needle so I can make more stitches in one go. Quilting stitches is a basic running stitch (or kachha stitches if you know what that means!).
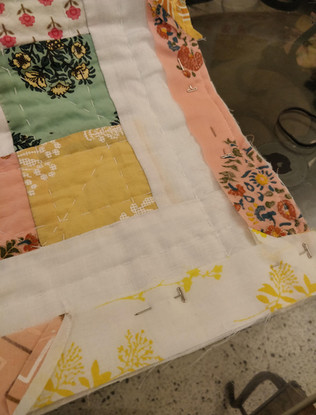
TAKE NOTE: Stabbing the needle through the layers doesn't really work because the stitches don't line up on the backing, so avoid doing that! It's best to push your needle through a few times like pictured below.

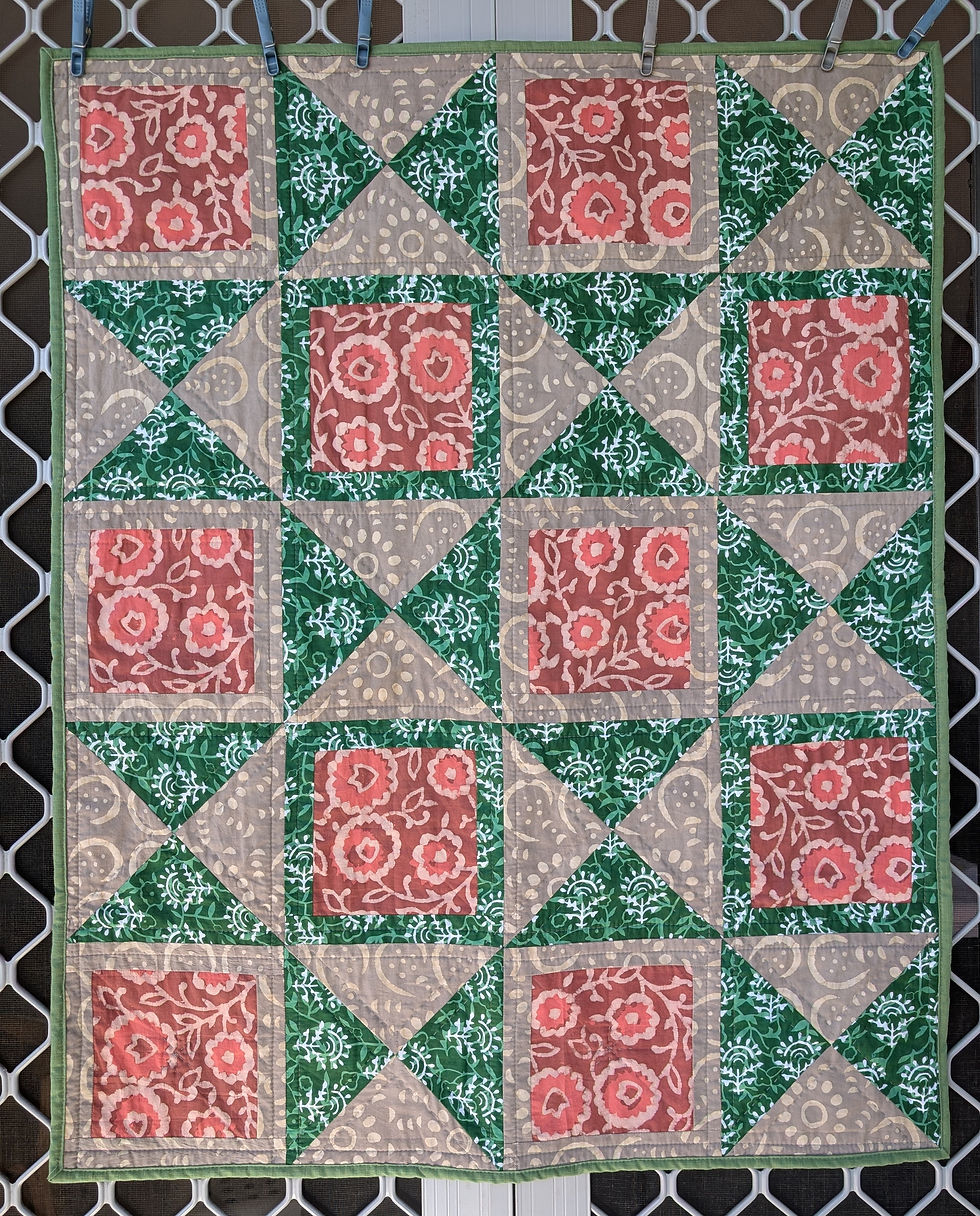
I used a simple pattern of intersecting lines over the quilt, with some differences here and there in the colored blocks. I used my quilting ruler and the back of a butter knife (yes, the back of a butter knife!) to mark where my stitches will go before sewing.

Press hard enough that you can see the lines as you're making them. The lines stay for quite some time before disappearing and you won't have to worry about pencil marks fading. The best part is that it already prepares the layers for quilting.

The Invisible/Disappearing Knot
This is possibly the most clever quilting skill I have learned! It's impossible to explain in pictures, so I'm going to post a photo of how it looks in my quilt and link to a video that explains this better.

And that's it! Work through your whole quilt as you like. You can be as creative as you like with your pattern till you have quilted through your whole quilt.

Trim your quilt edges. Get rid of excess batting and backing that so your three layers are neat and lined up. And you're ready to bind your quilt!


Binding Your Quilt
This is the final step in making your own quilt! You will need binding for this; I created my own binding using the leftover fabric from the quilt-top. I made my binding 1.5" wide because I didn't want to double the binding. You need the binding to be one continuous strip for a clean neat finish.
To calculate how much binding you need, calculate the perimeter of your quilt, which is simply, (length + width) * 2, and add an additional 12 inches to that for good measure. For this quilt I needed my quilt binding to be 256" long. To join two pieces of fabric I lay them together as shown below.

Draw a diagonal line with fabric marker, or a pencil.

Sew along the diagonal line. Get rid of the extra bits at the end.

Fold the fabric over till it's right side up.

Trim to size.

Diagonally joining fabric like this decreases the chances of it bulging at joins. Roll your binding as you make it.
Starting at the center of one of the long edges of your quilt, roll out the binding along the quilt edges, right sides together. Pin it at frequent intervals.
Sew along the quilt edge with a quarter inch margin. Leave about 10" of the binding free before you start sewing so it can be connected to the other end of the binding roll.


When you get to the corner, sew to the edge


of the quilt. Then fold your batting at a 45 degree angle outward and fold back onto the quilt. Sew along the edge again with a quarter inch margin. This will leave a small triangular flap free.
At the end of the binding (i.e. the same side where you started to bind your quilt, stop sewing about 10" from the finish. Using the same technique we used to join two strips of batting together, join the ends of the binding. Cut the leftover binding and trim it to size. Lay the newly joined binding edges on the quilt - make sure it lays flat - and sew over the ends of the fabric. I didn't take pictures of this, but there are many YouTube videos on how to join binding together.
When you've finished this side, fold your binding fabric over the quilt edge, tuck in the raw edges and press down the fabric with your fingers. Sew along the back with secure binding stitches. You can use whatever decorative stitches you like. Remember to not go through the fabric as it will show up on the other side. Go around the quilt and sew along the binding to secure the raw edges of the quilt with the binding fabric until you're finished.


Tuck in your loose threads and you're done! Congratulations on finishing your quilt.


Comments