
Quilt Pattern Tips and Tricks: Stars and Diamonds Quilt
- prarthanadickson

- Oct 5, 2022
- 5 min read
Updated: Jan 18, 2025
Hi there! Every time I write a pattern I find I want to include so many tips and tricks on constructing the quilt in the pattern. While this might be helpful for some quilters, I find that if I include everything it is too much information for others. So as a compromise, these blog posts will serve as an 'add on' to the pattern for anyone needing extra advice.
In this blog post I will be going over some tips and tricks for making the "Stars and Diamonds" Quilt. I chose to start with this particular pattern because a friend wanted a quilt made with this pattern for her daughter - that's the perfect excuse, right?! But kidding aside, it really is a lovely quilt pattern, and one that I enjoy making. This is one of my earlier quilt patterns, and it's a great pattern for a confident beginner, or anyone who would like to give their HST making and piecing skills an intense workout. The quilt pattern is available here and here (Etsy link).
Choosing Fabric
When it comes to choosing fabric, I'm always a nervous wreck. Sometimes the choices I pull together seem like they contrast way too much to work! Experienced quilters follow certain rules when it comes to fabric choices; I find rules a bit constricting and often pick fabrics that appear too contrasting to work together. My advice here would be - go with your gut, quilts are very personal, and each quilt reflects the maker's unique style. So if you find something works well together, that's all that matters!
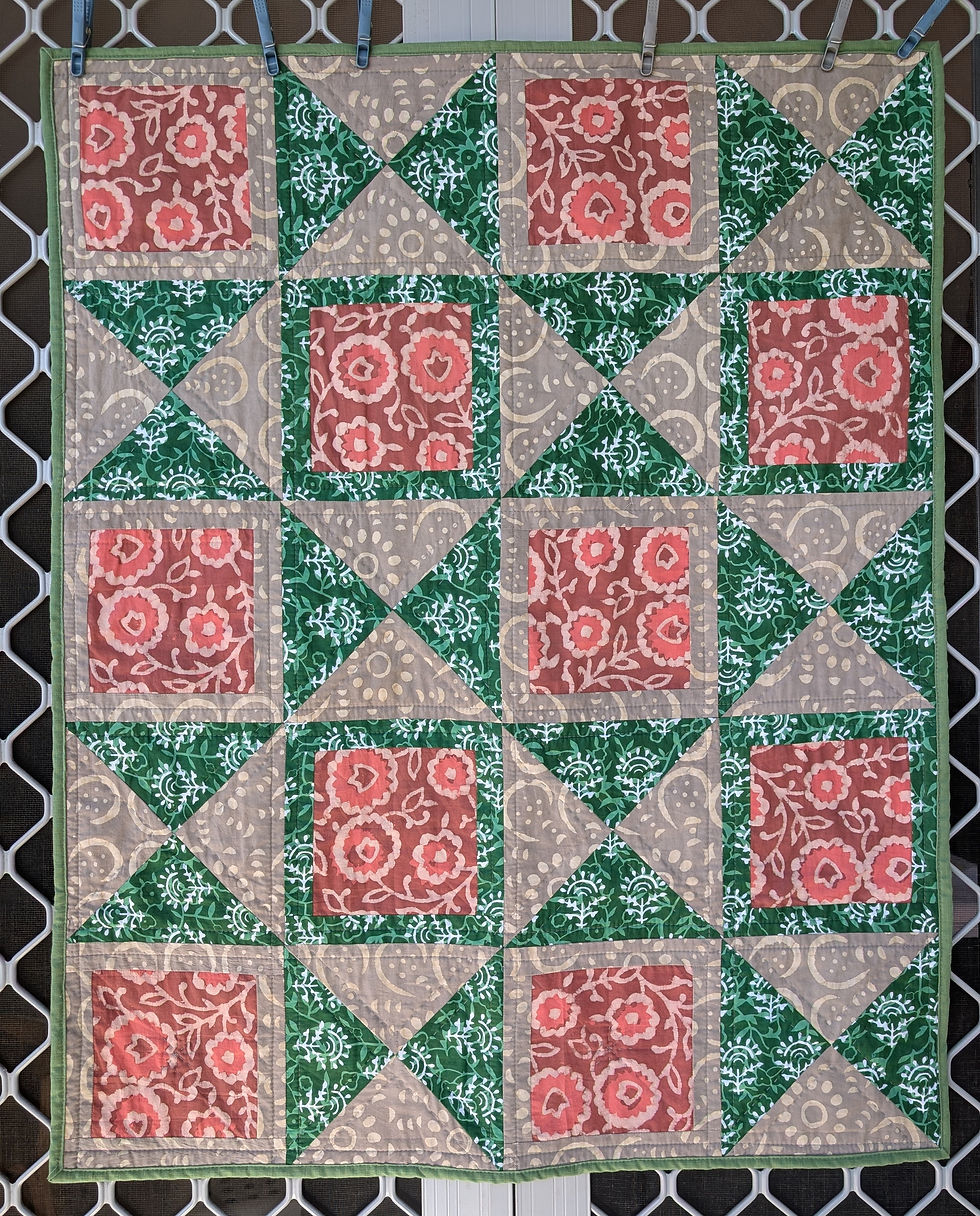
The Stars and Diamonds quilt is quite flexible when it comes to fabric choices. I wrote the pattern to be a stash/scrap buster and fabric requirements are given by colour rather than different fabric choices. BUT, just to be contrary, I decided to go with three distinct fabric choices with this quilt (mostly because I had already purchased some gorgeous fabric for the stars!).
I went with bright prints for my star blocks (yup, directional prints to boot!) with a darker teal fabric for the diamonds. The grey background fabric pulls everything together. The fabrics are not super 'matchy', but it seems to work together, so I decided not to overthink it.


Thankfully, the recipient of this quilt was equally pleased with the fabric pull. Phew!
Making HST - cutting 10" squares
The Stars and Diamonds quilt is a full HST or Half Square Triangle quilt - yes, every block is an HST! The pattern uses the 8-at-a-time method for constructing these, starting with 10" squares. If this is your first time using this method, or if you find it a struggle to cut accurate 10" squares, then you can try the following:
Start with 10.25" squares (instead of 10" squares); this will give you some extra room for trimming.
Skip the 8-at-a-time method altogether and use the 2-at-time method. Cut your starting squares to 5" squares instead. You will need to multiply the number of starting squares required by 4. If you've already cut your fabric to 10" squares, you can still use these! Sub-cut each 10" square into 4 5" squares.
Here's a quick rundown on the 2-at-a-time method for making HSTs:
Take two 5" squares of the fabrics that you would like to use in your HSTs. Place them on top of each other, right sides together. Pin in place.
On the back of one of the squares, draw a diagonal line from one corner to the other corner.

Cut along the diagonal. Open each HST and press away from the background fabric. Trim to size.
To get perfect points, line up the diagonal on your quilting ruler with the diagonal of the block when you square up!
Working with directional fabric when making the stars
Directional fabric when quilting is SO tricky! Especially when you're making HSTs. And as you can see from my fabric choices, all my prints were directional (what was I thinking?!). When working with directional fabric, we have two choices: a) go with the flow, and completely ignore the direction of the prints, or b) break your head a bit trying to get it all going in the same direction.
I went for a combination of the two. While it wasn't possible for me to get all my prints facing 'up', it was possible to organize it so the blocks were consistently going in the same direction. Here are some things to keep in mind when working with directional fabric:
When sewing your starter squares together (10" ones for 8-at-a-time, and 5" ones for 2-at-a-time), make sure your squares are oriented in the same direction consistently. This is especially important when working with two printed squares. They both don't have to be facing "up", so long as they're facing the same direction in every square. This step is super important as it will help us keep everything consistent in step 2.
It's also important that you use either the 8-at-a-time method or the 2-at-a-time method for making your HSTs; a combination of the two might mean that you won't have enough HSTs of a particular orientation to make your star blocks work.
When you are ready to sew your stars, lay out the squares in your star block in the orientation you would like. Pin in place and sew!
In the image below you can see that the heart prints are all facing up while the small flower printed fabric is horizontal.

Isn't it just the most gorgeous block?!
Spinning your seams
Seam bulk is a real issue for this pattern! The biggest bulk happens at the center of the star blocks. Pressing your seams open is always an option for bulky seams, but it is not a personal favourite of mine. So, instead of pressing my seams open, I decided to spin my seams instead. This not only reduces bulk at the center of the block, and allows it to lay nice and flat, it also helps with nesting seams when adding the two side strips to the center strip.
Now, if you're a newbie to spinning seams, I encourage you to check out the video links below for a detailed view of how to do this. I have also included some photos.
Teresa from SewnUpDownUnder has a great video for this; check it out here.
Snowy Day Quilting has a wonderful tutorial for spinning seams in pinwheel blocks; check it out here.
Click on the left or right arrows to go through the photos.


The pinwheel at the center is not perfect, but it works!
Unfortunately, this method doesn't work for the diamonds in the quilt pattern. The best way to tackle those is to press open.
That's all from me! If you have any specific questions about this pattern that you would like answered, please leave a comment below.
Have you made this quilt, or are you currently making this quilt? Make sure you tag me @cecesquiltsandthings on instagram so I can check it out! And when you post on social media, use with the tag #starsanddiamondsquilt You can also check out photos by others who have made this quilt by following that tag on instagram.
Happy Sewing!
Prarthana


Comments